Planning Outdoor Lighting Using Layered Lighting Design
By Steven Stead
There’s a secret that not many people talk about when it comes to planning outdoor lighting and it all revolves around layered lighting design.
This takes the principle of using layered lighting indoors and applies it to gardens.
If done correctly, it can transform your outdoor spaces into magical oases of light.

But what is layered lighting design and how can you use it when you’re planning outdoor lighting?
Layered lighting is simply the use of different light sources to illuminate a space, which sounds straightforward.
However, it’s how you make these different light sources work together that can be truly transformational when it comes to introducing the correct Light For The Garden.
If this sounds daunting then don’t worry – we’ve got your back. We’ll take you through our simple process that will enable you to introduce a layered lighting design to your garden like a pro.
Before we do that, let’s look at the tools at your disposal, namely the three different light sources you’re going to use to create the layered lighting effect:
1. Task Lighting:
This type of lighting, or layer, focuses on specific areas where you need brighter, more focused light for activities such as dining, reading and safely navigating pathways.
Task lighting is vital to ensure safety and the usability of your garden after dark.
Good task lighting choices include:
· Bollard Lights: Ideal for lining paths and driveways where they offer clear illumination for safe passage. Bollard lights come in various styles, ranging from classic to contemporary, so you’re bound to find one to complement your garden design.
· Path Lights: These are usually smaller and more discreet than bollard lights and are usually at a lower level. Their purpose is to guide footsteps along walkways and steps, preventing trips and falls while emphasising texture on the ground. Choose low-level path lights with a warm feel to create a welcoming ambiance.
· Step Lights: These are recessed or surface-mounted lights which illuminate steps to enhance safety and visibility. Step lights can be integrated into walls, decking or steps for a seamless look.
2. Ambient Lighting:
This is your foundation lighting layer which provides the main illumination for your garden area. It aims to deliver a comfortable level of light that has a soft and relaxing feel that’s not harsh in any way.

Here are some of the common ways to deliver ambient lighting:
· String Lights: These are hugely popular and create a magical, festive-like feel with festoons of fairy lights draped across trees, pergolas or fences. The soft, twinkling glow can add informal and playful charm to your garden.
· Lanterns: You can use these to add a touch of elegance and warmth by placing them on tables, pathways or hanging them from branches. Choose from traditional candle lanterns, modern LED versions or even cubes for a contemporary twist.
· Wall Lights: Provide subtle illumination and architectural interest when mounted on walls. Wall lights can wash surfaces with a gentle light, highlighting textures and creating a sense of depth. You can also mount them on fences.
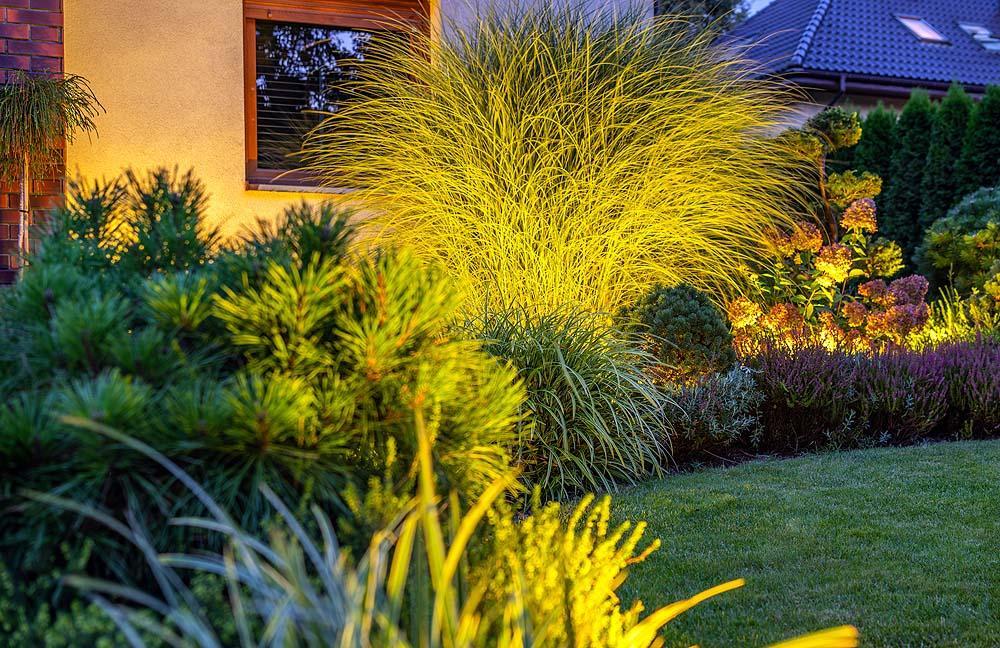
3. Accent Lighting:
his is what can really bring your layered lighting design together – accent lighting aims to pick out key features in your garden to add depth and visual interest. Think of it as creating focal points to showcase your garden’s star attractions.
Great choices for accent lighting include:
· Spotlights: Direct a focused beam of light onto a specific object, such as a sculpture, a specimen tree, a fountain or some other kind of architectural element. Spotlights can be adjusted to highlight different angles and textures.
· Up lights: Place these at the base of trees, shrubs or walls to create dramatic silhouettes and highlight textures. Uplighting can also add a sense of height and grandeur to your garden.

Now that you know what layered lighting design involves, you just need to put together a plan for your garden.
To do that, follow our simple eight-step process:
1. Task Lighting – list all the areas where you need good illumination for specific activities at night, such as paths, dining areas, cooking areas, etc.
2. Ambient Lighting – first, identify and list all the areas of the garden you will be using and second, list any other areas you would like to have lit. You don’t normally want to light your whole garden.
3. Accent Lighting – take a note of your garden’s best features and which ones you want to light up.
4. Set Your Mood – most people will want their outdoor spaces to have a warm and relaxing feel so look for light fixtures and light bulbs with a colour temperature of between 2,700 Kelvin and 3,000 Kelvin. If you want a cooler feel that’s more energising then aim for 4,000 Kelvin or higher. Read more about colour temperature in our separate blog post.
5. Select Your Brightness Level – it’s impossible to provide a definitive answer as you need to try different lights in your space to see what’s right for you. To give you a general idea, here are typical light fixtures and/or light bulbs brightness levels for common activities:
|
Brightness Level |
Lumens (lm) |
Use Cases |
|
Low |
100-300 |
Pathway marker, decorative garden lighting, soft porch lighting |
|
Low/Medium |
300-800 |
Small wall lights, entryway lights, porch sconces |
|
Medium |
800-1500 |
Porch and patio lighting, driveway lighting, stair lights |
|
Medium/High |
1500-2500 |
Security lighting (motion sensors), garage lighting, larger garden lights |
|
High |
2500-5000 |
Floodlights for security, driveway and parking area lights, outdoor sports court lighting (small courts) |
|
Very High |
5000+ |
Stadium lighting, large area floodlights, streetlights |
You can read more in our How Bright Should My Garden Lights Be? blog post.
6. Measure – work out the approximate measurements of each of the spaces you want to light to give you an idea of how many light fixtures you might need.
7. Decide On Control And Automation – work out whether you’re happy to manually switch your outdoor lighting on and off, or if you want automations in the form of dimmers, timers and motion sensors, which can add convenience while improving energy efficiency and security.
8. Make A Test Purchase – once you have a general idea of the brightness levels you think you need, purchase a small number of each of the different types of lighting (ambient, task and accent) so you can test them in your garden to see what works for you. That will then let you see what exactly you need for a second order to complete your project.
Examples
To help you get an idea of how this can work, here are some practical examples of light layering transforming different areas of your garden:
· Patio with Dining Area: Combine ambient lighting from string lights or lanterns with task lighting from spotlights over the dining table. This creates a welcoming atmosphere for al fresco dining while ensuring sufficient light for enjoying meals.
· Garden Path: Use path lights for subtle illumination along a walkway, combined with up lights to showcase surrounding plants and trees. This creates a magical, inviting path that draws you deeper into the garden.
· Water Feature: Combine underwater lights with spotlights to highlight the cascading water and create a wonderful focal point. The interplay of light and water will add a touch of enchantment to your garden.
· Seating Area: Use soft, warm lighting from lanterns or wall lights to create a cosy and intimate atmosphere. Add spotlights to highlight nearby plants or sculptures, adding visual interest and depth.

Conclusion
You now have the knowledge and a clear process to be able to purchase the lighting you need to transform your garden.
Light layering is a powerful technique that can transform your garden into a captivating and inviting space at night.
Combining different types of lighting and using them strategically can create a multi-dimensional landscape that enhances your garden's beauty, functionality and ambiance.
If you need further inspiration, here are Six Of The Best Garden Lighting Ideas from BBC Gardener's World Magazine to get you started.
FAQs
Q: What are the best types of lights for layering in a garden?
A: A combination of wall lights, up lights, downlights, spotlights, path lights, and string lights can be used to create a layered lighting effect. The best choice depends on the specific area and desired effect.
Q: How do I avoid over-lighting my garden?
A: Start with a few key lights and gradually add more as needed. Avoid illuminating every corner of your garden. Embrace the beauty of shadows and allow some areas to remain subtly lit.
Q: How can I use shadows effectively in my garden lighting?
A: Use uplighting or directional lights to create interesting shadows that add depth and dimension. Experiment with different angles and intensities to achieve the desired effect.
Q: What is the best way to light pathways and steps?
A: Use low-level lights with a warm colour temperature (3,000 Kelvin or less) to illuminate pathways and steps safely and create a welcoming atmosphere. Consider path lights or step lights with a diffused light source to avoid glare.
Q: Can I install garden lighting myself?
A: Simple installations, such as solar lights or battery-powered fixtures, can be a DIY project. However, for mains-powered lighting or complex setups, it's recommended to hire a qualified electrician.
Q: What IP ratings do I need for outdoor lights?
A: You need to look for a rating of at least IP44 but preferably more. You can read more about IP ratings for outdoor lights in our blog post.